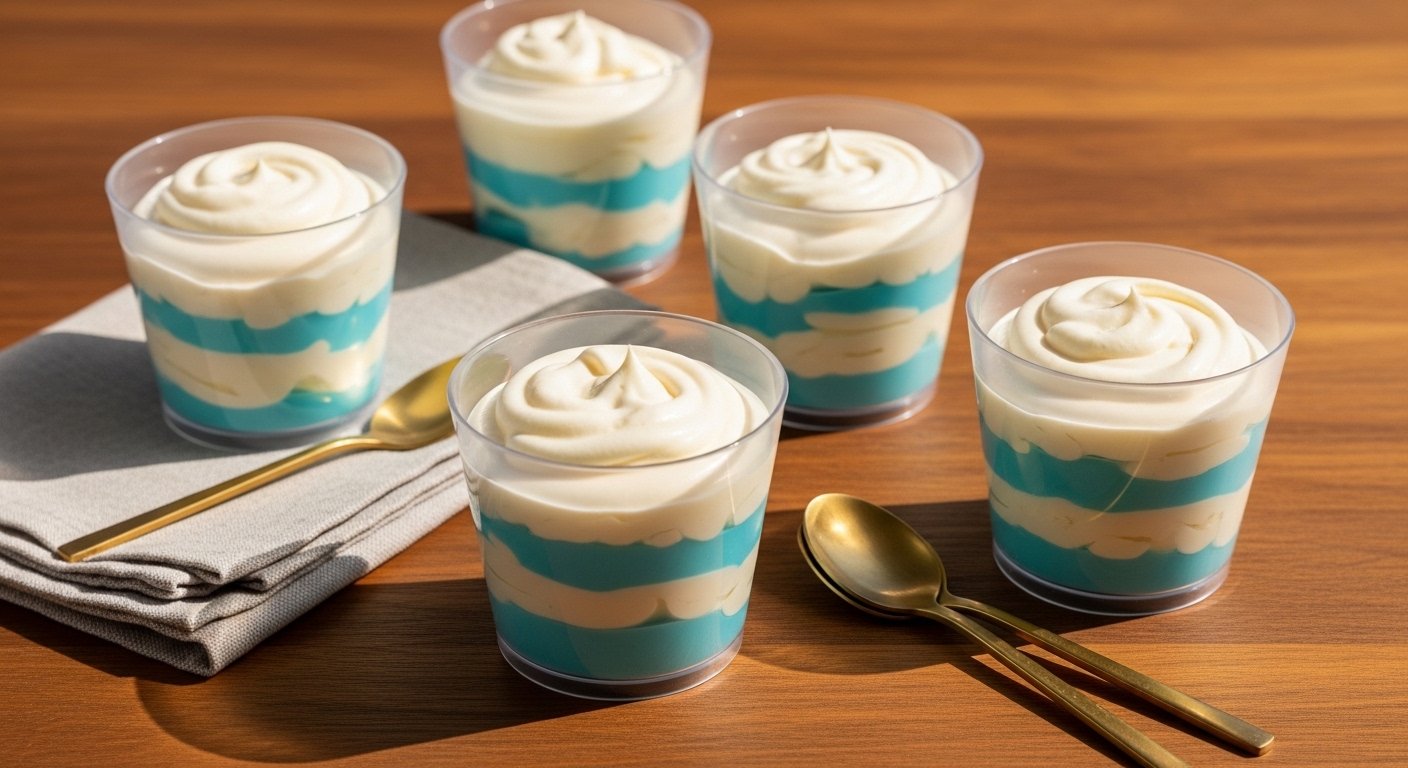
You want a fuss-free dessert that looks party-ready and stays cold all night. These no-bake Cool Whip dessert cups are layered, quick to assemble, and easy to transport.
You’ll solve plating stress and feed a crowd without an oven. This guide walks you through each step, tools to use, and timing so every cup is perfect.
How to Make No Bake Cool Whip Dessert Cups For Easy Party Servings
These are individual, layered dessert cups built without baking: a crunchy cookie or graham crumb base, a creamy pudding layer folded with Cool Whip, and a light whipped topping. Texture is crunchy then pillowy; flavor is sweet and crowd-pleasing.
They finish chilled and hold up well for parties. Each step is fast—most prep under 20 minutes, then chill for the set.
Ingredients
- 2 cups crushed graham cracker crumbs or crushed sandwich cookies (about 12 full graham sheets)
- 6 tbsp unsalted butter, melted (helps crumbs hold)
- 2 (3.4 oz) boxes instant vanilla pudding mix
- 3 cups cold milk (for pudding)
- 2 cups thawed Cool Whip or similar whipped topping
- Optional: fresh berries, chocolate shavings, or toasted nuts for garnish
- 12 (4–6 oz) glass dessert cups or small jars for serving
Step-By-Step Instructions
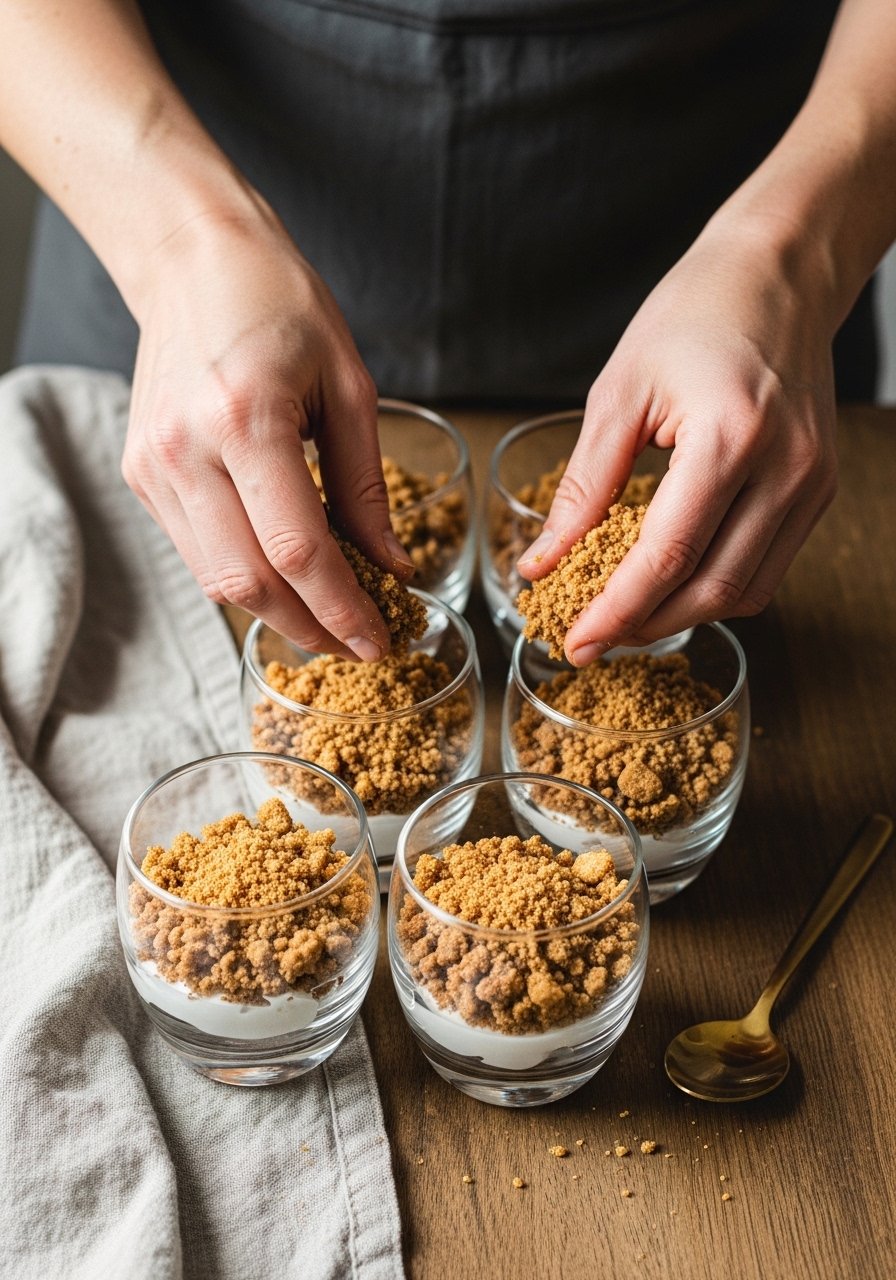
Prepare the crumb base.
Combine crumbs and melted butter in a medium bowl until the mixture holds when pressed. Use 2 cups crumbs to make 10–12 cups. This base gives crunch and structure to each cup. If you need uniform cups, use Glass Dessert Cups for consistent sizing.
Make the pudding.
Whisk instant pudding and cold milk for 2 minutes until thickened. Let it sit 2–3 minutes to fully set. This creates a stable, creamy layer that binds with the Cool Whip and won’t weep when chilled. A set pudding keeps layers clean.
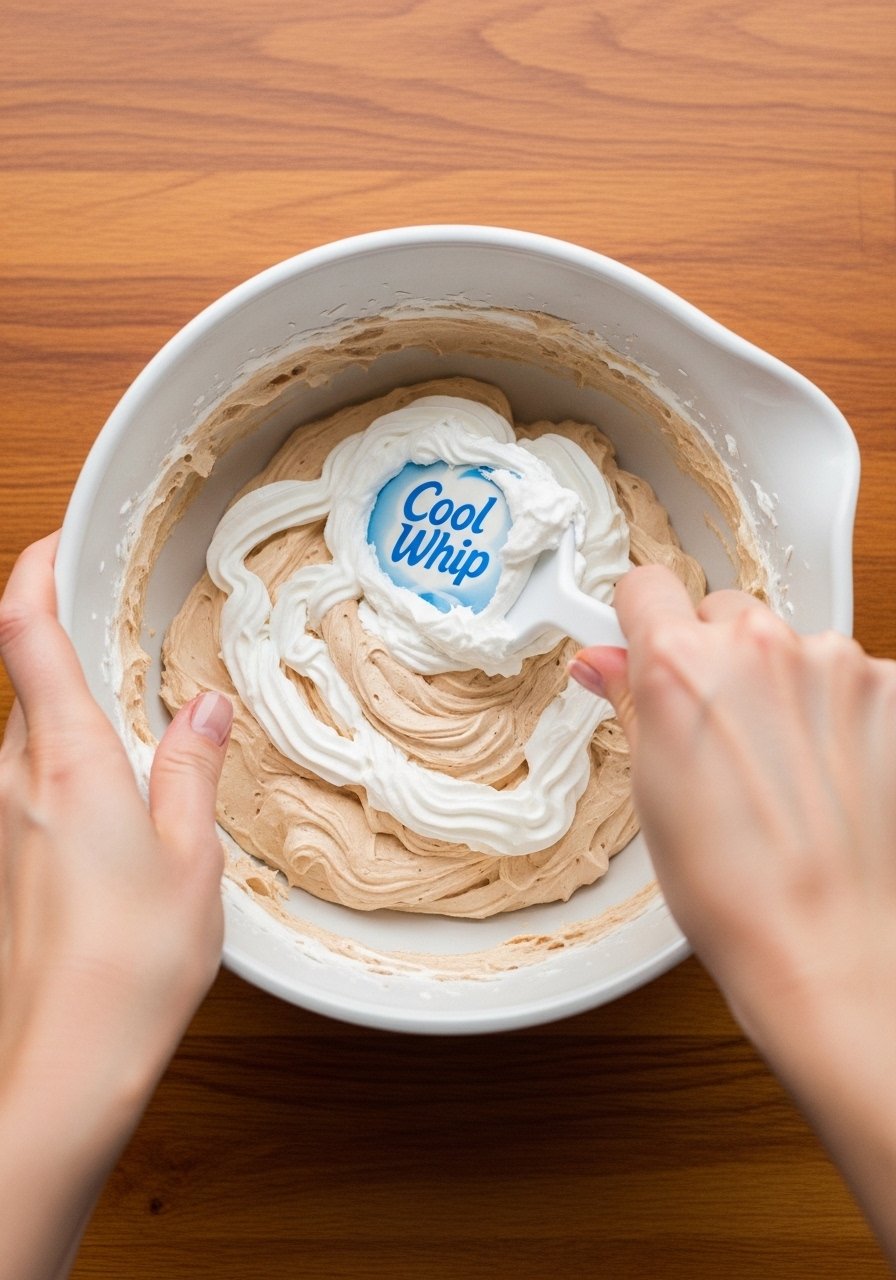
Fold in the Cool Whip.
Gently fold 2 cups of thawed Cool Whip into the pudding with a silicone spatula until smooth. Folding preserves air for light texture. Use a sturdy Silicone Spatula to scrape the bowl clean and keep the mix airy.
Assemble and chill.
Layer 1–2 tablespoons of crumbs, then pudding mixture, repeat and finish with a small dollop of Cool Whip. For neat layers, pipe pudding using a disposable Piping Bag. Chill at least 1 hour; 2–4 hours is best for set and transport stability.
Make-Ahead and Storage
You can assemble the cups up to 24 hours ahead. After assembling, cover them tightly with plastic wrap or a lid and refrigerate. Chill helps layers firm and flavors meld.
Store leftovers in the fridge for up to 3 days. Avoid freezing—Cool Whip texture degrades when frozen and thawed.
Serving and Presentation Tips
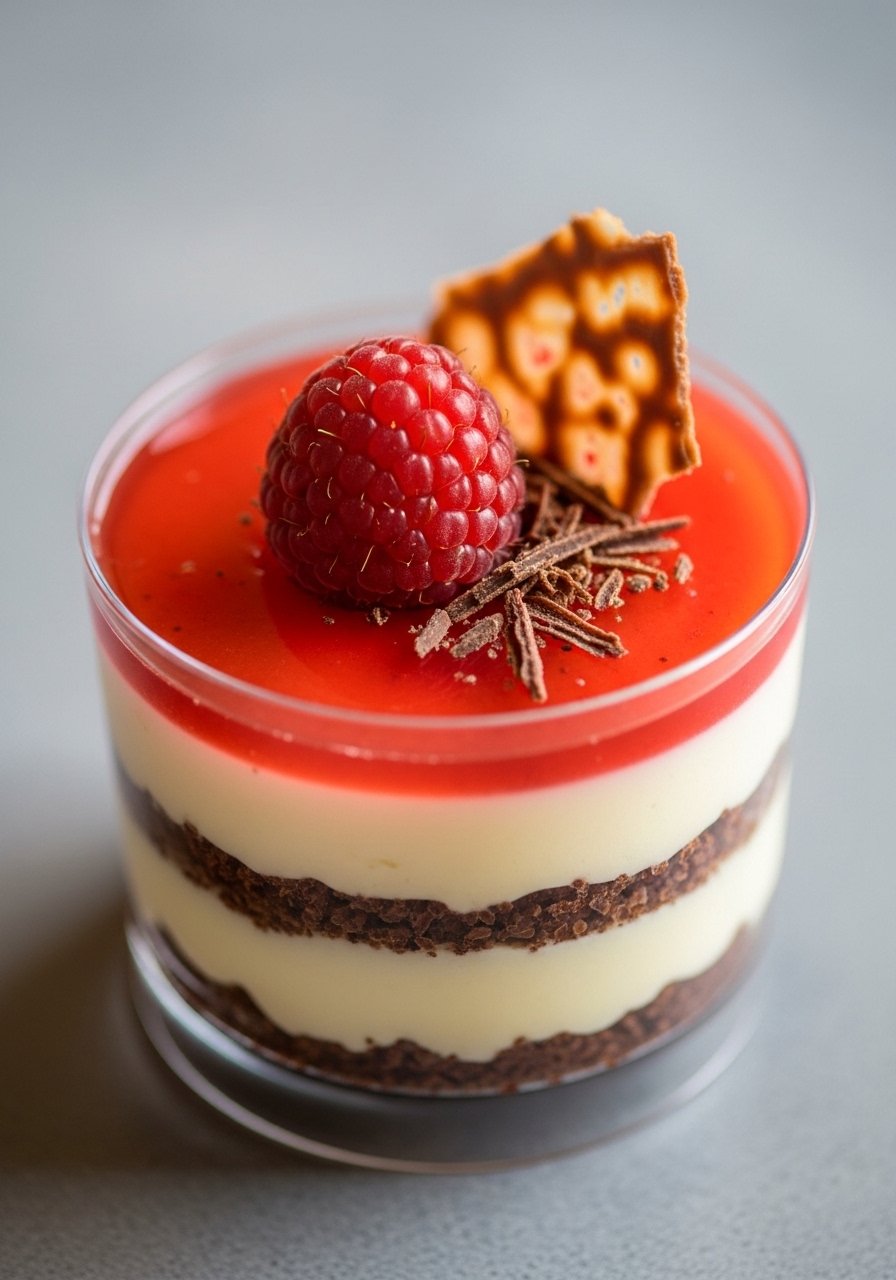
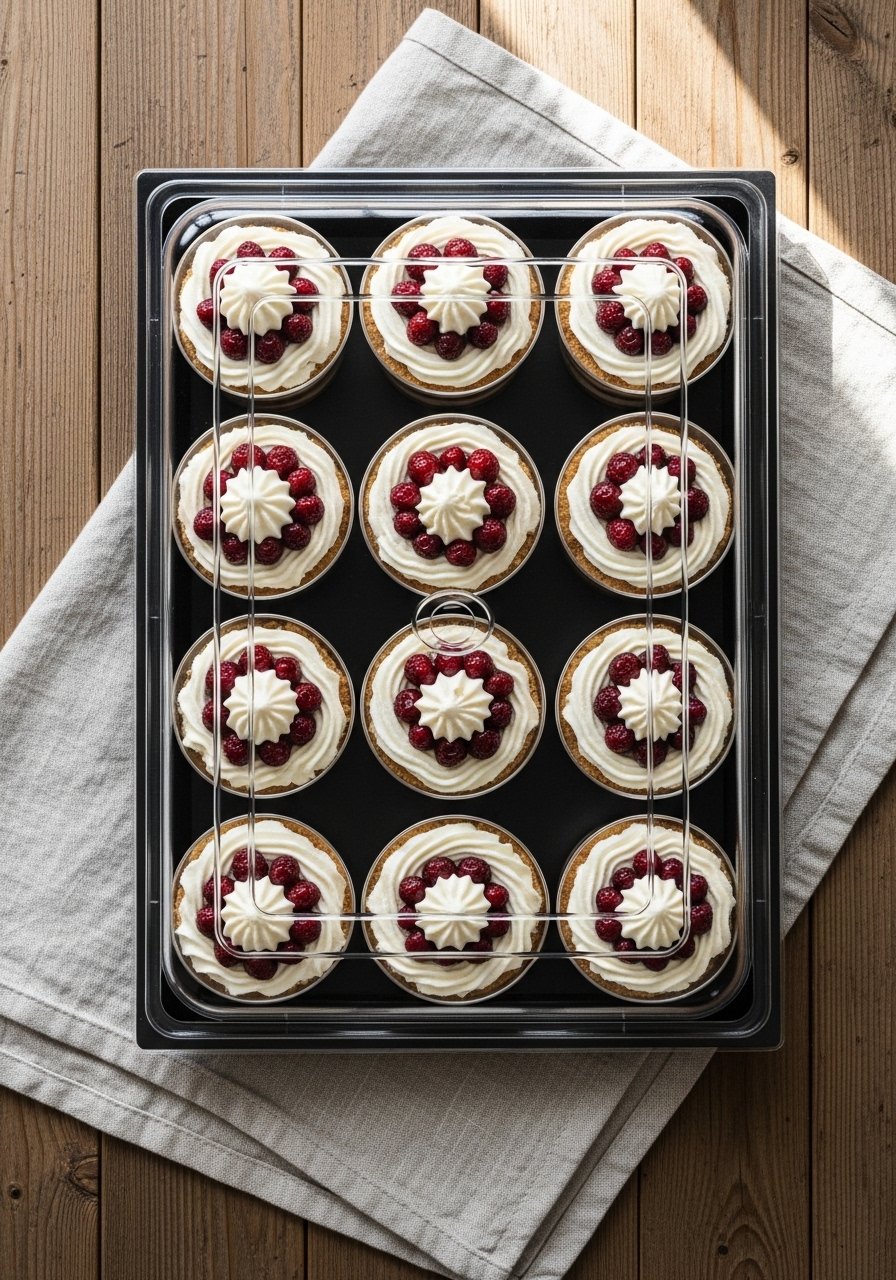
Serve straight from the fridge on a tray with small spoons. Garnish just before serving to keep a fresh look—berries or quick chocolate shavings work great. For a polished look, pipe a swirl of Cool Whip on top.
If transporting, place cups in a shallow box with a layer of crumpled parchment to prevent sliding. Chill the transport container beforehand.
Common Mistakes to Avoid
Don’t skip chilling—immediate serving will be softer and less tidy. Overmixing the pudding and Cool Whip makes the texture dense. Fold gently.
Avoid too much butter in the crumb base; it becomes greasy. Aim for crumbs that hold together when pressed, but aren’t oily.
Quick Topping Ideas (No Recipe Changes)
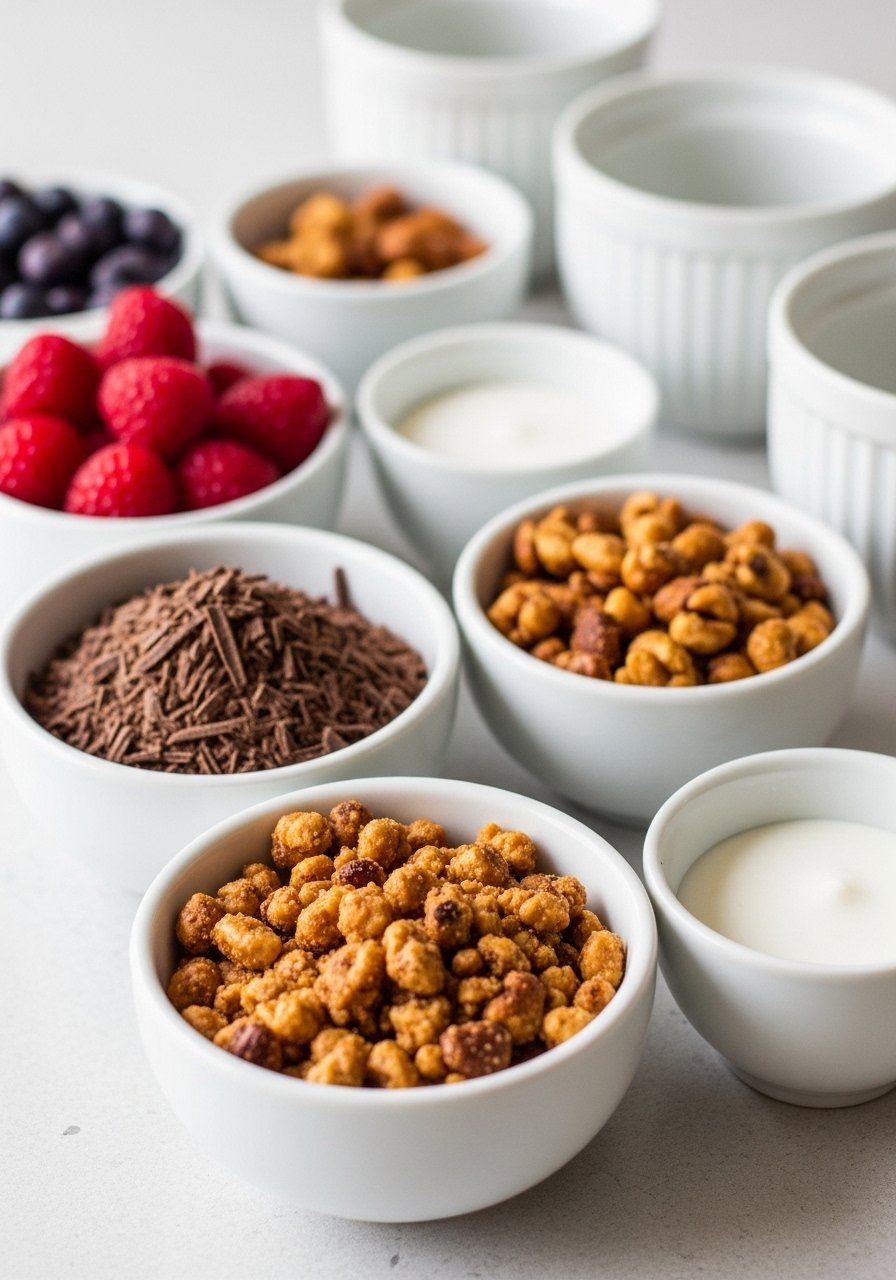
Use one topping per cup for clean presentation. Fresh berries add brightness, while chocolate shavings add richness. Nuts add crunch—toast briefly in a skillet for better flavor.
Keep garnishes light so they don’t weigh down the Cool Whip or make the cups soggy.
Final Thoughts
These no-bake Cool Whip dessert cups are fast, repeatable, and friendly for parties. You’ll spend more time greeting guests than baking.
With simple tools and a short chill time, you can create attractive single-serve desserts that travel well and please a crowd.
Leave a Reply